How to Install Printer on Windows XP: A Step-by-Step Guide
Installing a printer on Windows XP can seem like a daunting task, but it's actually quite straightforward. In this article, we'll walk you through the process of adding a network printer to your Windows XP computer. Before you begin, make sure you have access to the necessary drivers for the printer. These drivers can usually be found on the printer manufacturer's website or on the installation disc that came with the printer.Step 1: Click on the Start Button and Select "Printers and Faxes"
Click on the Start button and select "Printers and Faxes" from the menu. This will open the Printers and Faxes window, where you can add a new printer.Step 2: Click on "Add Printer"
In the Printers and Faxes window, click on the "Add Printer" button. This will open the Add Printer Wizard window, where you can select the type of printer you want to add.Step 3: Select "Local Printer Attached to This Computer"
Step 4: Choose the Printer Port
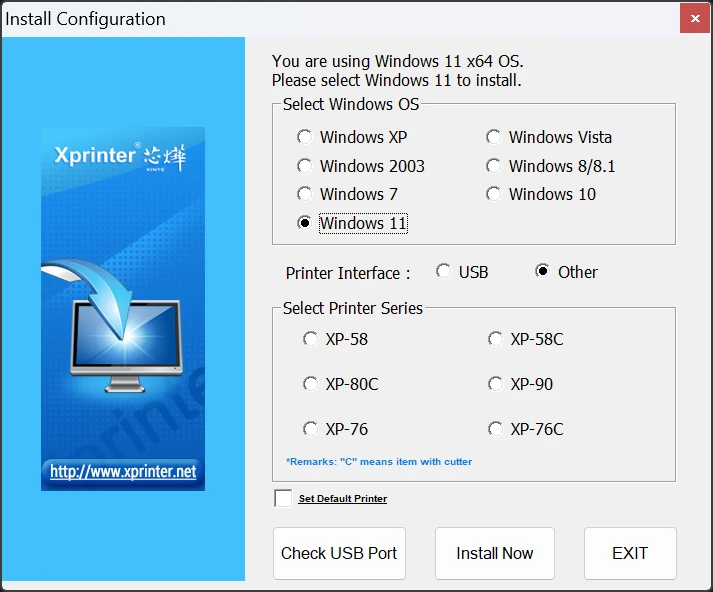
Select the printer port that you want to use for the printer. If you're not sure which port to use, consult your printer's manual or contact the manufacturer's support team.Step 5: Select the Printer Driver
Select the printer driver that you want to use for the printer. If you have the driver installed on your computer, you can select it from the list of available drivers. If you don't have the driver installed, you can download it from the printer manufacturer's website.Step 6: Install the Printer Driver

Step 7: Connect to a Network Printer
If you want to add a network printer, follow these steps: * Connect to a network printer via IP address: If you are not part of an active directory domain, then you will have to connect to the network printer via its IP address. In order to do this, you will first need to know the IP address of the printer. * Connect to a network printer from a domain: If you are part of an active directory domain, then you can connect to the network printer using the domain name of the printer.Connecting to a Network Printer using IP Address
To connect to a network printer using its IP address, follow these steps: * Click on the Start button and select "Printers and Faxes" * In the Printers and Faxes window, click on "Add Printer" * Select "Network Printer Attached to This Computer" * In the "Network Printer Attached to This Computer" window, click on "browse" * In the "Browse for Network Printer" window, enter the IP address of the printer and click "Next" * Follow the prompts to install the printer driverConnecting to a Network Printer from a Domain

 Download, Install & Update on ...")


![Realtek Rtl8139 Win7 X64 Driver [Archive] - Forums](https://www.how2shout.com/wp-content/uploads/2024/10/installing-Windows-Copilot-using-Winget.png "Realtek Rtl8139 Win7 X64 Driver [Archive] - Forums")


 for Microsoft Windows XP ...")


